The EmailShepherd CLI (beta)
What is the EmailShepherd CLI?
Section titled “What is the EmailShepherd CLI?”The EmailShepherd CLI provides a powerful way for developers to build and maintain their Email Design Systems locally.
It is also a tool that is designed to be used with AI coding agents - it provides all the tools and instructions they need to understand how to make changes to your EDS.
Prerequisites
Section titled “Prerequisites”There are a few things you will need before you start using the CLI:
- Ensure you have Node.js 18 or higher installed
- An EmailShepherd API key
- An existing Email Design System in EmailShepherd
Development Environment
Section titled “Development Environment”Given this is a project that includes TypeScript, we highly recommend using an IDE that has good support for TypeScript, such as VSCode, Cursor IDE, Antigravity - or any other VSCode based IDE or IDE that has good TypeScript support. That way you will get autocomplete, error highlighting and other helpful features.
We also recommend installing the Shopify Liquid extension. It will give you syntax highlighting, code formatting and other useful features.
Getting Started
Section titled “Getting Started”To get started with the CLI, run the following command:
npm create @emailshepherd/eds@latestYou will be prompted to enter your api key.
› create @emailshepherd/eds@latestNeed to install the following packages:@emailshepherd/[email protected]Ok to proceed? (y) y

> npx> create-eds
Welcome to EmailShepherd
> Enter your EmailShepherd API key: ****************************************
Hit Enter, and you will be prompted to select:
- The workspace the EDS belongs to
- The EDS
- A name for your repository
Once you’ve entered these details, the CLI will initialize a new repository for you.
Login & Logout
Section titled “Login & Logout”When you initialize a new repository, your API key is automatically stored at ~/.config/emailshepherd/credentials.json so you don’t need to log in separately. However, if you ever need to update your API key or log in on a different machine, you can use the login command:
npx emailshepherd loginYou can also pass the API key directly with the --api-key flag:
npx emailshepherd login --api-key <your-api-key>To remove your stored credentials:
npx emailshepherd logoutRepository Structure
Section titled “Repository Structure”The default generated repository structure looks like this:
src/├── eds.ts # Main EDS configuration (required)├── design_tokens.ts # Global design tokens├── custom_styles.ts # Rich text custom styles├── container_component/│ ├── index.ts # Container field definitions & config│ └── template.liquid # Container HTML + Liquid template└── components/ └── index.ts # Component list └── <component>/ ├── template.liquid # HTML + Liquid template └── index.ts # Field definitions & configREADME.md # README fileAGENTS.md # Agent instructions.gitignore # Git ignore file.env # Environment variablespackage.json # Project dependenciestsconfig.json # TypeScript configurationThe eds.ts file is the main EDS configuration file, and it is required. You can choose to restructure the repository as you see fit for your workflow, as long as you include the eds.ts file.
Previewing your EDS
Section titled “Previewing your EDS”To preview your EDS and get a live preview of your rendered components while you work, you can run the following command:
npx emailshepherd devThis will start a local development server at http://localhost:5173. The page automatically refreshes whenever you save a file, so you can see your changes instantly.
You will see an overlay panel to the left side of the screen, so you can tweak field values to see how your components look with different values.

You will also be able to access the fully rendered HTML file in dist/rendered.html. This is useful for uploading to your client preview device testing tool.
If you don’t want to run a development server but just want to get the rendered HTML file, you can run the following command:
npx emailshepherd render
# renders to dist/rendered.html
Checking for errors
Section titled “Checking for errors”Because this project is written in TypeScript, if you make a mistake in your component definitions, you will see errors highlighted instantly in your IDE:
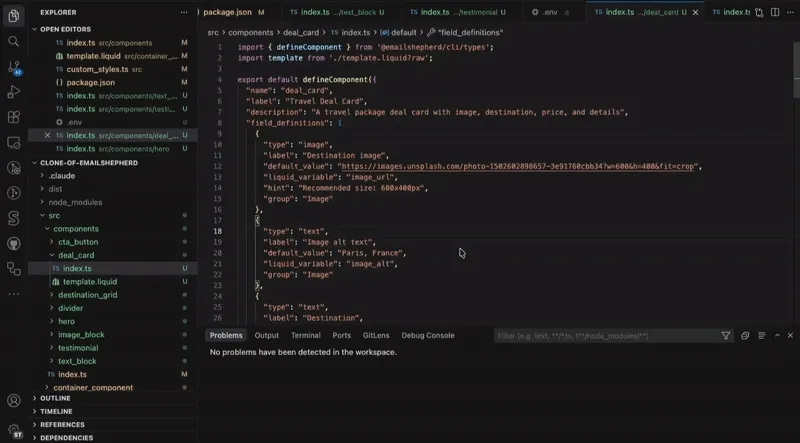
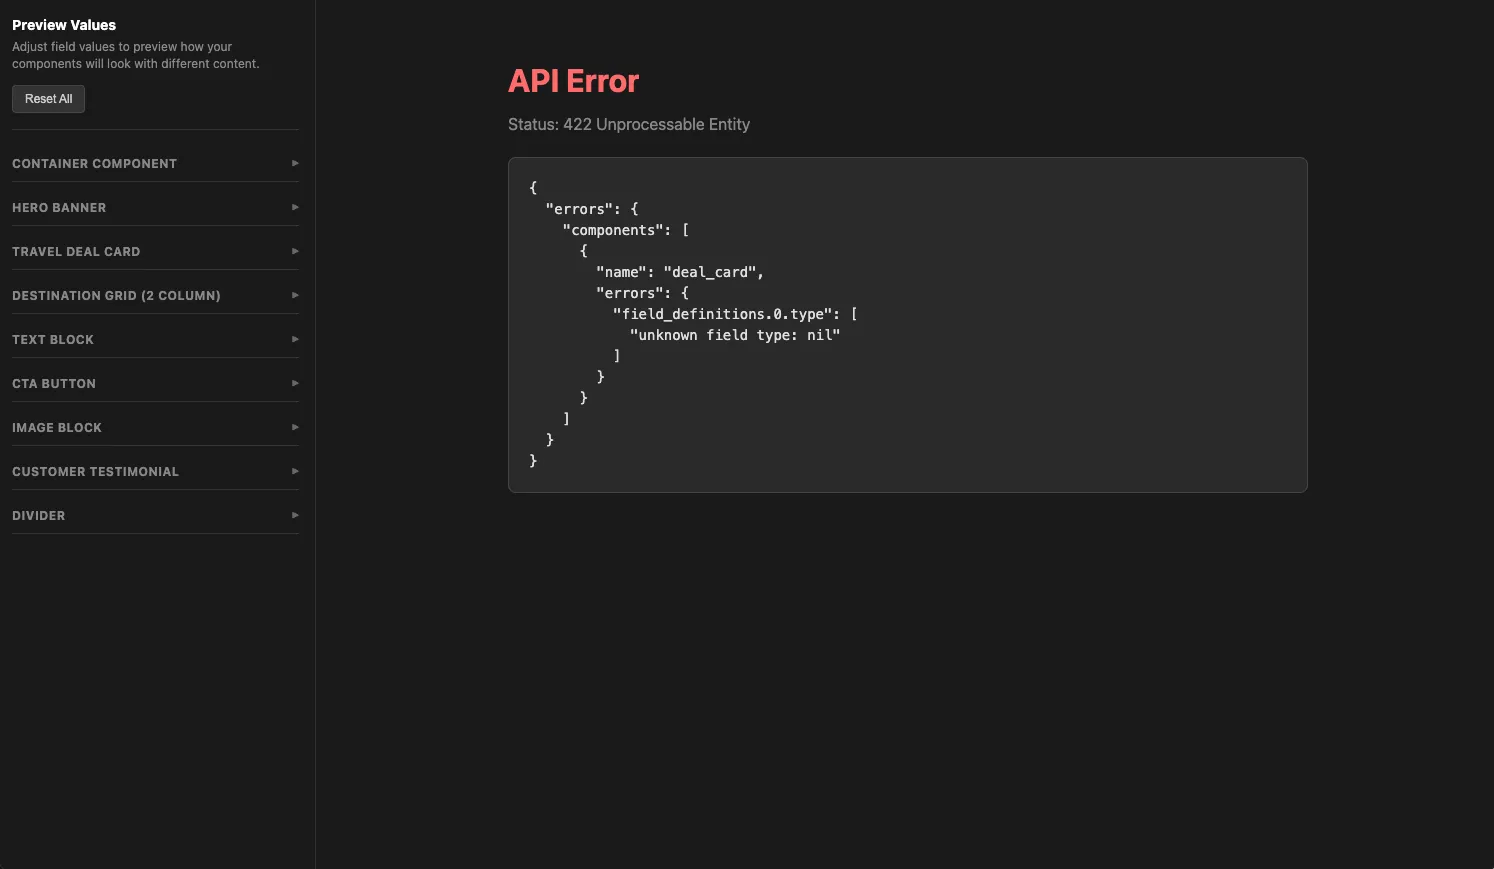
The dev server also checks the TypeScript types and validates the EDS structure against the EmailShepherd API in real time, so if you are running the dev server you will see the errors there too:
You can also run the validate command to check for errors:
npx emailshepherd validateUsage with AI Coding Agents
Section titled “Usage with AI Coding Agents”The EmailShepherd CLI is designed to work well with any modern AI coding agents, such as Claude Code, OpenCode, Cursor IDE, Goose, GitHub Copilot, Codex, Gemini CLI and others.
Out of the box the repository includes a preconfigured AGENTS.md which is supported by most agents. This includes the CLI commands, project structure, and a link to the agent EDS reference. The AGENTS.md instructs agents to read this reference before making any changes — it’s always kept up to date, so you can also point your agents to it directly if needed. You may wish to customize the AGENTS.md further to your own needs.
We also recommend making use of the Agent Skills standard with instructions custom tailored for your own organization/workflow/EDS.
For typical workflows, we recommend whitelisting the following commands:
npx emailshepherd validatenpx emailshepherd renderAnd requiring approval (human in the loop) for the following commands:
npx emailshepherd deployThat way your coding agent can make changes to your EDS, validate its work, fix any issues autonomously, but will request your approval before deploying changes to EmailShepherd.
CI/CD Workflows
Section titled “CI/CD Workflows”One of the benefits of using the CLI to develop your EDS is that you can check your work in to Git, and use established best practices for code review and CI/CD before deploying changes to EmailShepherd.
Example workflow:
You may want to run a GitHub Action workflow to validate your EDS when PRs to main are opened, and deploy your changes to EmailShepherd when the PR is merged. This is how you would do it:
name: Validate EDS
on:  pull_request:    branches:      - main
jobs: validate: runs-on: ubuntu-latest steps: - uses: actions/checkout@v6 - uses: actions/setup-node@v6 with: node-version: lts/* - name: Install dependencies run: npm ci - name: Validate EDS run: npx emailshepherd validate env: EMAILSHEPHERD_WORKSPACE_ID: 'your-workspace-id' EMAILSHEPHERD_EDS_ID: 'your-email-design-system-id' EMAILSHEPHERD_API_KEY: ${{ secrets.EMAILSHEPHERD_API_KEY }}name: Deploy EDS
on: push: branches: - main
jobs: deploy: runs-on: ubuntu-latest steps: - uses: actions/checkout@v6 - uses: actions/setup-node@v6 with: node-version: lts/* - name: Install dependencies run: npm ci - name: Validate EDS run: npx emailshepherd validate env: EMAILSHEPHERD_WORKSPACE_ID: 'your-workspace-id' EMAILSHEPHERD_EDS_ID: 'your-email-design-system-id' EMAILSHEPHERD_API_KEY: ${{ secrets.EMAILSHEPHERD_API_KEY }} - name: Deploy EDS run: npx emailshepherd deploy env: EMAILSHEPHERD_WORKSPACE_ID: 'your-workspace-id' EMAILSHEPHERD_EDS_ID: 'your-email-design-system-id' EMAILSHEPHERD_API_KEY: ${{ secrets.EMAILSHEPHERD_API_KEY }}