
Localization
Localization lets you create different language or regional versions of an email without building a separate email for each audience. For example, you can keep English, French, and German versions together in one email.
This guide covers setting up your organization’s locales, adding translations, reviewing each version, and choosing which locales to export.
Configure your organization’s locales
Section titled “Configure your organization’s locales”Open the organization menu in the sidebar and choose Organization settings, then open App configuration. Under Localization:
- Use Enabled Locales to select the languages and regional variants your team needs. You can search the list to find a locale.
- Set Default Locale to one of your enabled locales. This is the locale selected by default when creating a new email; you can choose a different default locale in the new-email form.
- Click Save Changes.
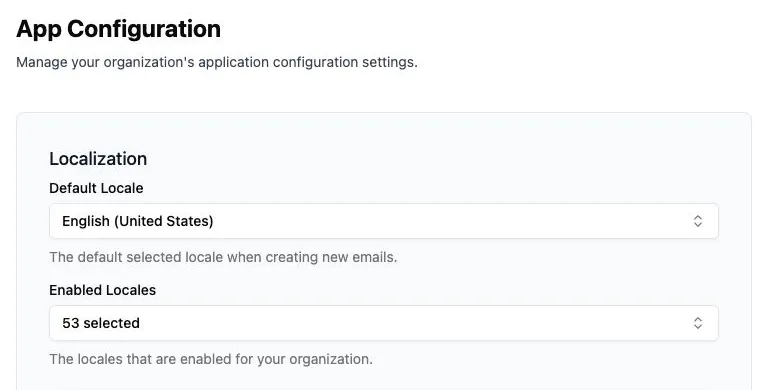
Enabling a locale makes it available to add to emails. It does not automatically add or translate that locale in every email. If a locale is missing when you try to add it to an email, check that it is enabled here.
You need permission to manage app configuration to save these settings. If you cannot access them, ask your organization’s administrator.
How localized emails work
Section titled “How localized emails work”All locales in an email share the same components and their order. The content—the values you enter into fields—can be different for each locale. This includes the subject line, preheader, and component content such as headings, body text, and button labels.
For example, a button can say “Shop now” in English and “Acheter” in French while remaining the same button component. Depending on the fields available in your email design system, you can also adapt links and images for each audience.
Adding, removing, or reordering a component changes the shared email structure across locales. To leave a component out of a particular locale, use its visibility controls instead of deleting it.
Add locales and translate your email
Section titled “Add locales and translate your email”Start by preparing the content in your email’s default locale. Both manual and AI translation use that version as their starting point.
In the editor toolbar, click the globe icon labeled Locales, then click Add locales. Under Locales to add, choose one or more of your organization’s enabled locales. Locales already in the email are not listed here.

Translate manually
Section titled “Translate manually”- Select the locales you want to add.
- Choose Translate manually.
- Click Add 1 locale.
- Close the Locales panel, switch to each new locale using the editor’s locale dropdown, and replace the copied content with your translations.
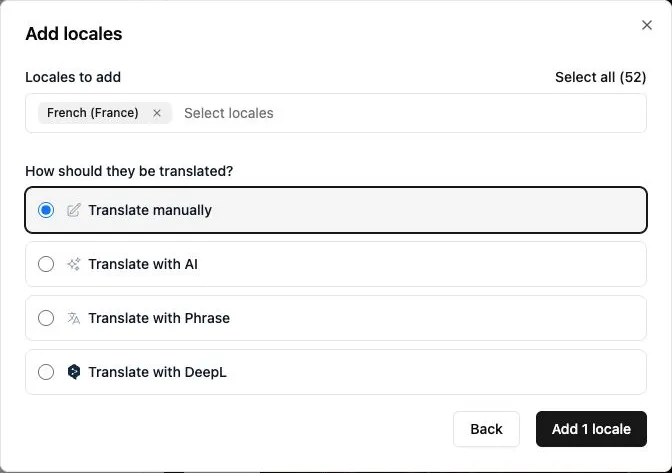
Translate manually copies the email’s default-locale content into each selected locale. It does not translate the text. The new versions initially contain the same content as the default locale, ready for you to edit.
Translate with AI
Section titled “Translate with AI”- Select the locales you want to add.
- Choose Translate with AI.
- Click the Add locales confirmation button, which shows how many locales you selected.
- Wait for the translation to finish. The Locales panel shows its progress. You can close the panel and reopen it by clicking Translation in progress in the toolbar; editing is locked while translation is running.
- Switch to each new locale and review the translated content. Adjust wording, links, and images as needed for that audience.
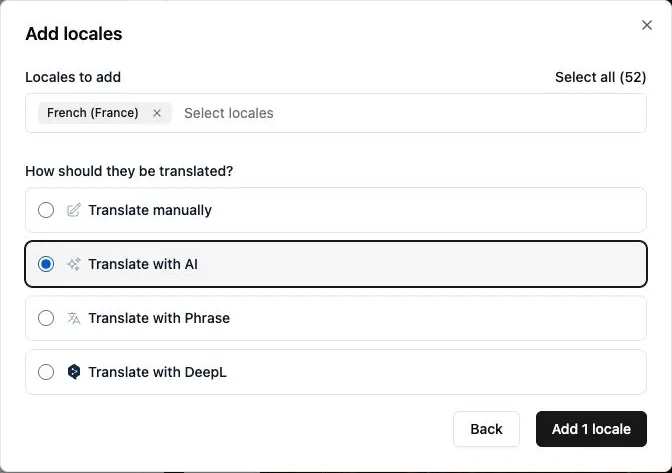
Check the subject line, preheader, and preview as part of your review. Translated text can take up more or less space than the original, so check button labels and longer paragraphs in particular.
Translate using a CSV
Section titled “Translate using a CSV”You can download your email’s content as a CSV, send it to a translator or edit it in a spreadsheet application, then upload the completed translations. This works for both adding new locales and updating existing translations.
- Open Locales using the globe icon in the editor toolbar.
- Click Import / export translation spreadsheet, then Download spreadsheet (CSV).
- Open the CSV in your spreadsheet application. Each row contains one locale’s content. The locale column identifies the language and region, such as
en-USorfr-FR; the other columns contain the content to translate. - Edit an existing locale’s row, or duplicate the default locale’s row and change the locale value to add a new translation. Replace the copied content with the translated content.
- Save the completed file as a CSV.
- Return to Import / export translation spreadsheet, click Choose file, select your CSV, then click Upload spreadsheet.
- Once the upload completes, use the editor’s locale dropdown to review the imported content. New locales in the CSV are added to the email automatically.
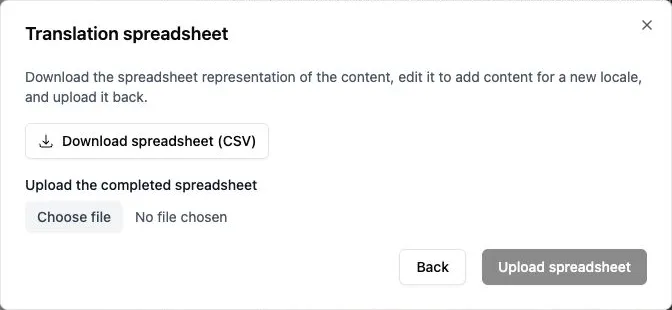
Keep the downloaded column headings unchanged, and preserve any formatting or personalization tags in the content. Uploading replaces the content for the locale rows included in the file, including blank cells, so leave existing text in place where you want to keep it.
If the upload reports that the headers do not match, download a fresh CSV from the email and transfer your translations into it. This can happen if the email’s components or fields have changed since the original download.
Switch between locales
Section titled “Switch between locales”Use the locale dropdown in the editor toolbar to choose the version you want to view or edit. It shows the locales that have been added to this email.
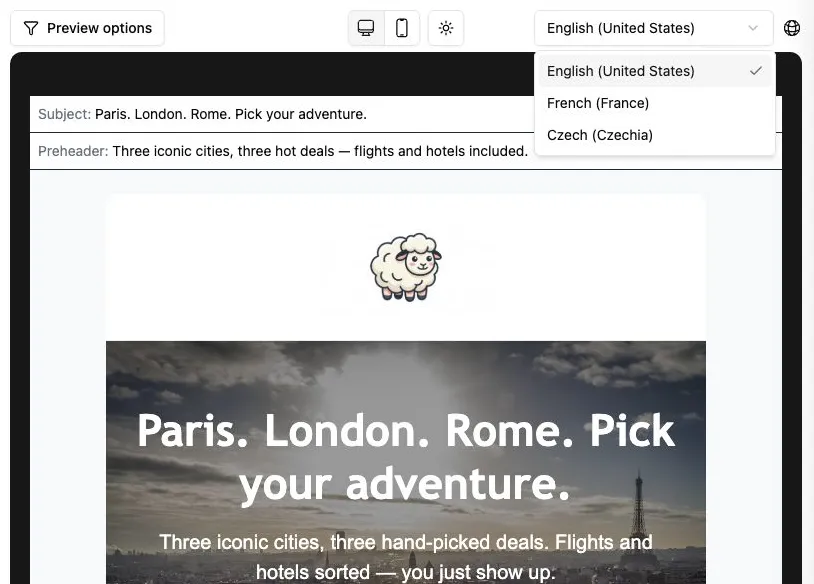
When you select a different locale, the editor fields and email preview show that locale’s content. Check the selected locale before editing: changes to field values apply to that locale, while changes to the component structure are shared.
Show or hide components by locale
Section titled “Show or hide components by locale”You can include a component for some audiences and hide it for others—for example, a promotional section that only applies in one region.
- In the editor’s component list, hover over the component to reveal its actions.
- Click the eye icon labeled Toggle visibility.
- In Toggle locale visibility, turn each locale’s switch on to show the component or off to hide it.
- Switch between locales to check the result in the preview.
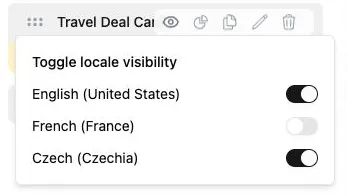
In this example, the Travel Deal Card is shown in English and Czech and hidden in French.
The component stays in the email, so you can show it again later using the same switches. Hiding it in one locale does not hide it in the others.
Choose which locales to export
Section titled “Choose which locales to export”Once you have reviewed and published your email, open Export and choose your export format or connector.
- For HTML or JSON, use Locales to select the versions you want to include. You can export one, several, or all of the email’s locales.
- For a connector export, choose the export action for each locale. Select Skip for any locale you do not want to export.
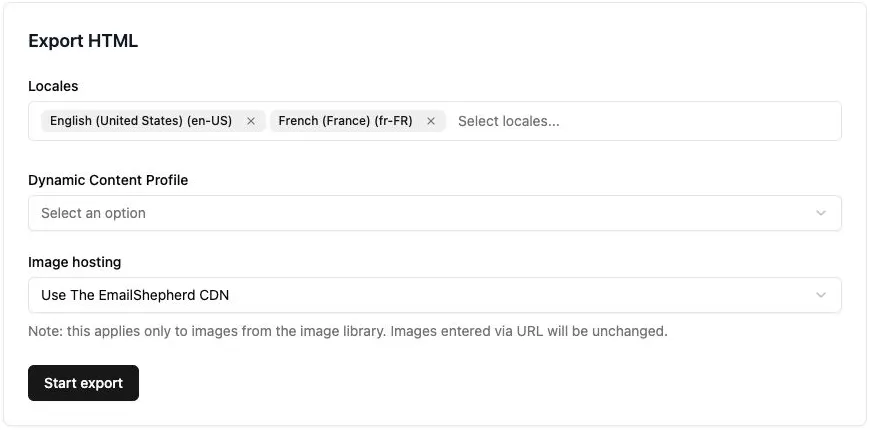
Complete the remaining export options and click Start export. Leaving a locale out of an export does not remove it from the email; you can export it later when it is ready.