

Iterable
This article shows you how to connect EmailShepherd to Iterable, so you can export emails to Iterable as email templates.
You set up the connector once for each workspace. After that, anyone who can export emails can send them to Iterable without copying any code.
Get your Iterable API key
Section titled “Get your Iterable API key”-
Sign in to Iterable.
-
Navigate to Integrations > API Keys.
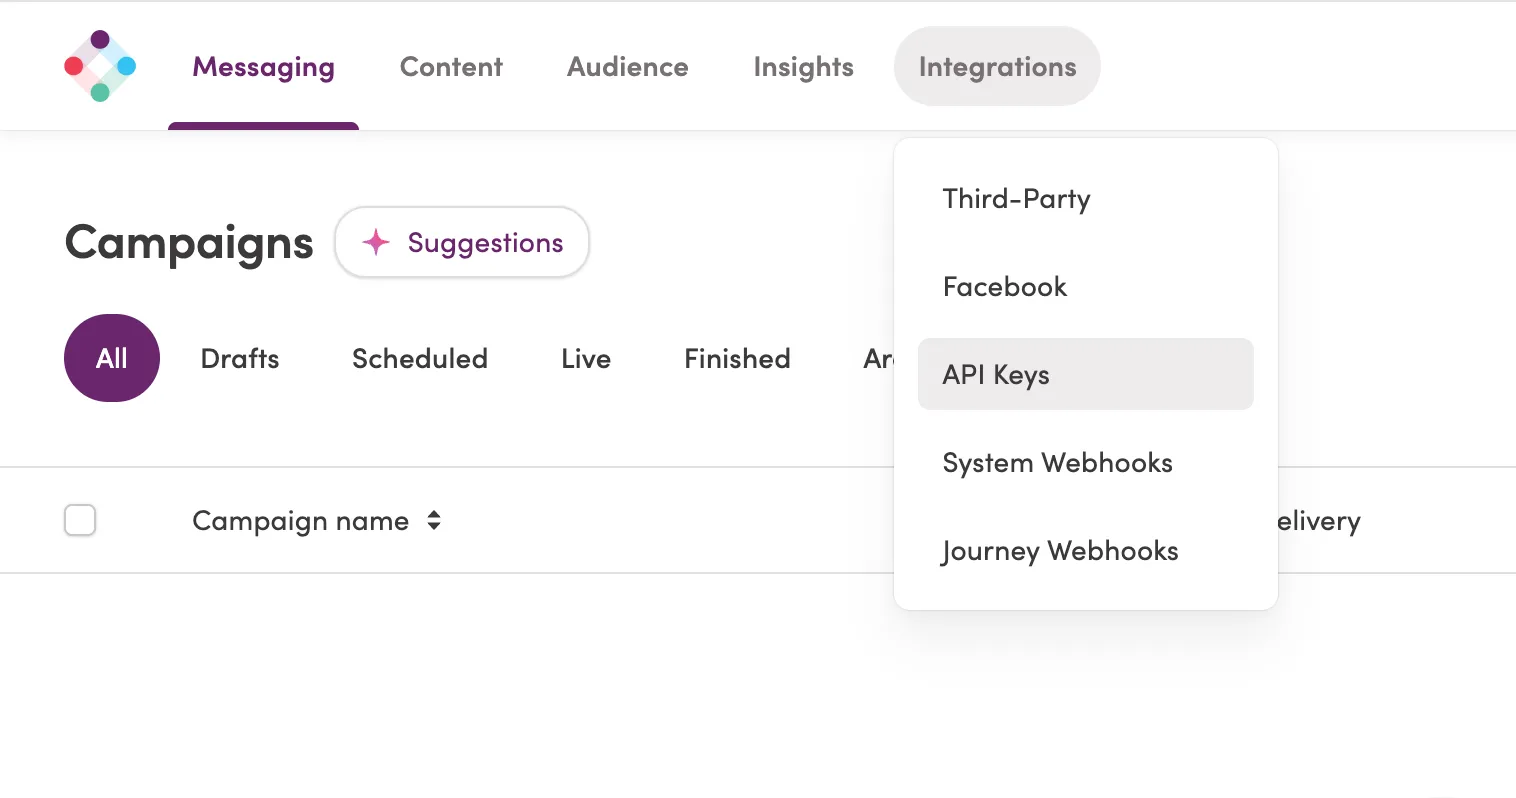
-
Click New API Key.
-
Enter a name for the key, such as
EmailShepherd. -
In API key type, select Server-side.
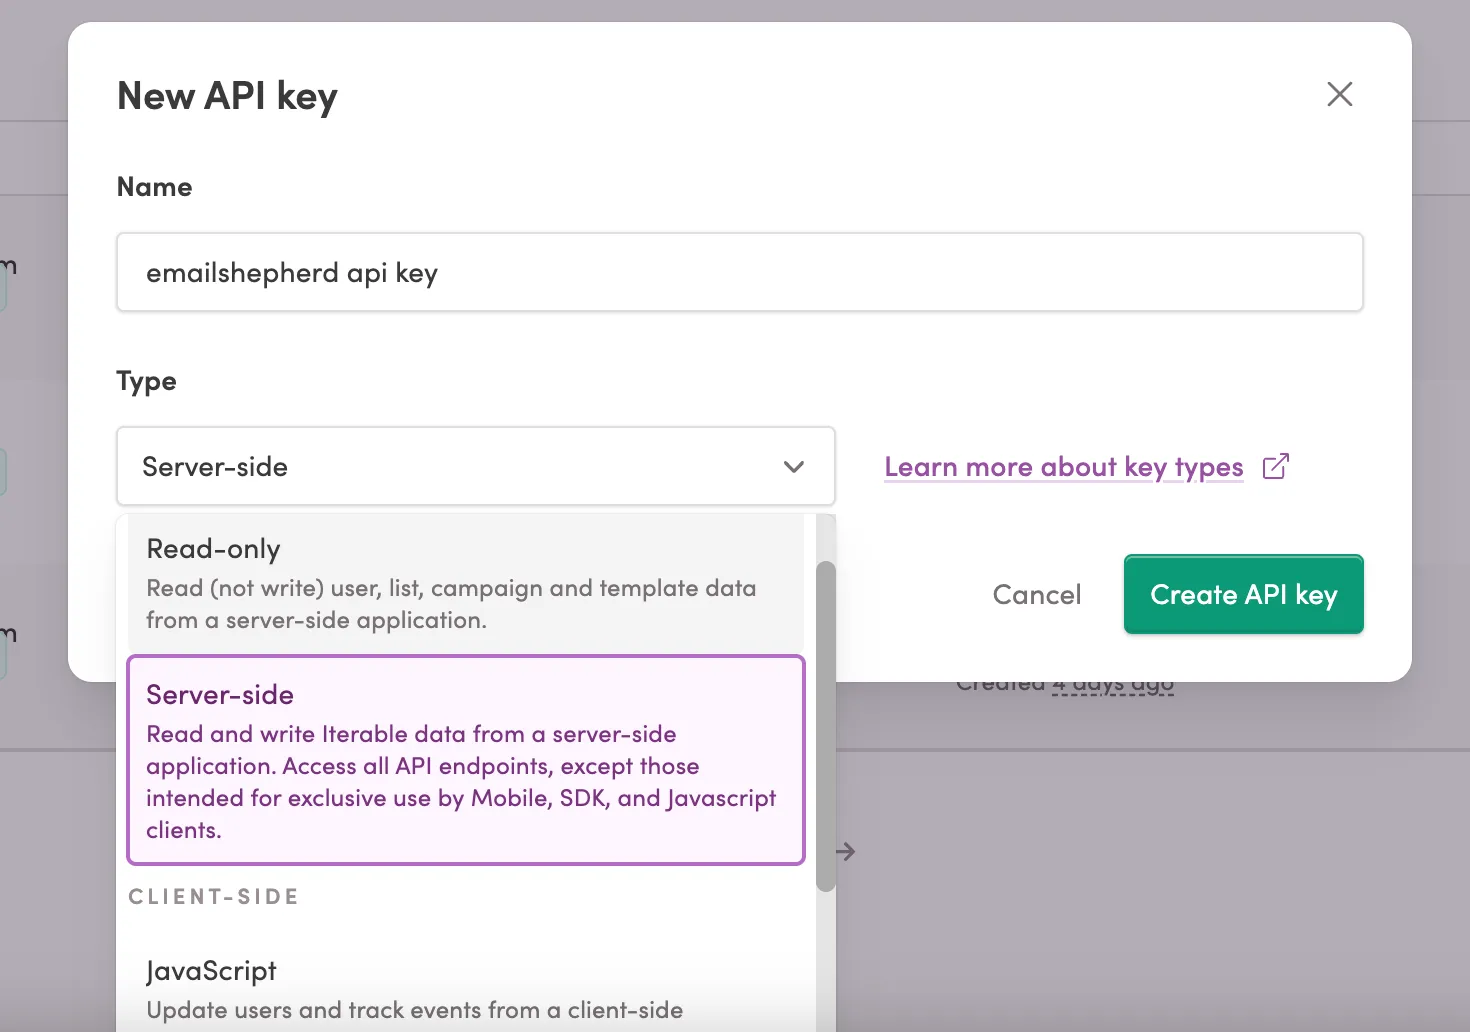
-
Click Create.
-
Copy the API key and keep it somewhere safe until you’ve set up the connector.
You also need to know whether your Iterable project is in the US or EU data center.
Set up the connector in EmailShepherd
Section titled “Set up the connector in EmailShepherd”- In the sidebar, click Connectors.
- On the Export Connectors tab, click Add connector.
- In Connector Name, enter a name, such as
Iterable. - In Choose Integration, select Iterable.
- In Data Center, select US Data Center or EU Data Center.
- In API Key, paste the API key you created.
- In Dynamic Content Profile, choose a dynamic content profile to use every time you export to Iterable. To choose one each time you export instead, leave it as None.
- Click Create Connector.
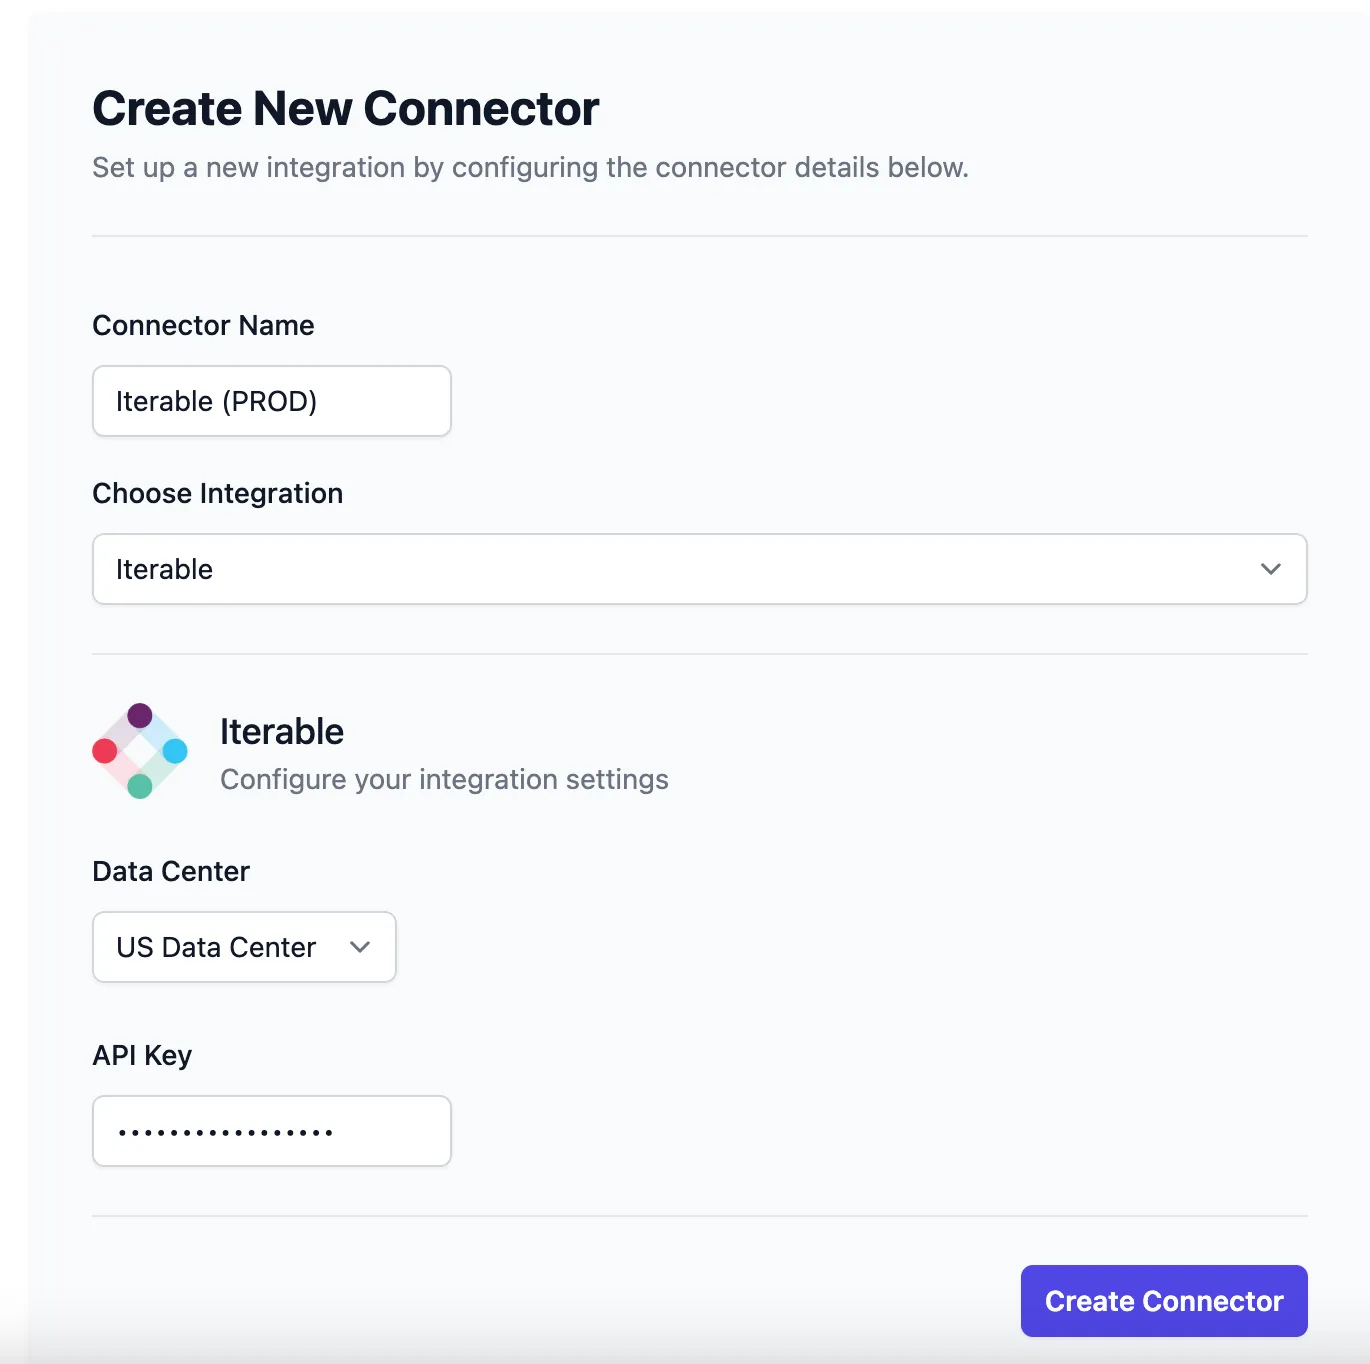
Set up personalization for Iterable
Section titled “Set up personalization for Iterable”Iterable uses Handlebars for personalization and dynamic content, such as {{firstName}}.
To export your personalization tags and conditionals in Iterable’s syntax, set them up in a dynamic content profile for Iterable, then choose it in the connector or when you export.
Export an email to Iterable
Section titled “Export an email to Iterable”See How to export an email to your ESP.
Each locale is exported as a separate email template in Iterable, including the subject line, preheader and a plain-text version.