

Salesforce Marketing Cloud
This article shows you how to connect EmailShepherd to Salesforce Marketing Cloud (SFMC), so you can export emails to Content Builder.
You set up the connector once for each workspace. After that, anyone who can export emails can send them to Salesforce Marketing Cloud without copying any code.
Get your Salesforce Marketing Cloud credentials
Section titled “Get your Salesforce Marketing Cloud credentials”To connect EmailShepherd, you create an installed package with an API integration in Salesforce Marketing Cloud.
-
Sign in to Salesforce Marketing Cloud.
-
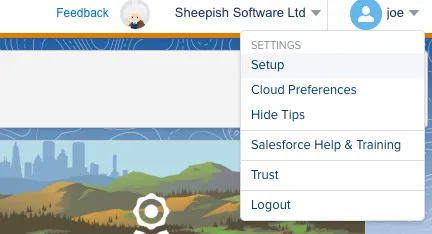
Click your profile icon in the top-right corner, then select Setup.
-
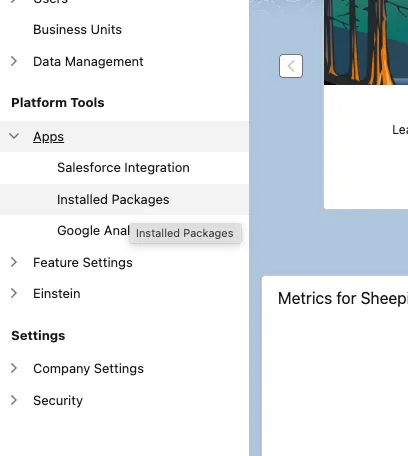
In the sidebar, navigate to Apps > Installed Packages.
-
Click New.
-
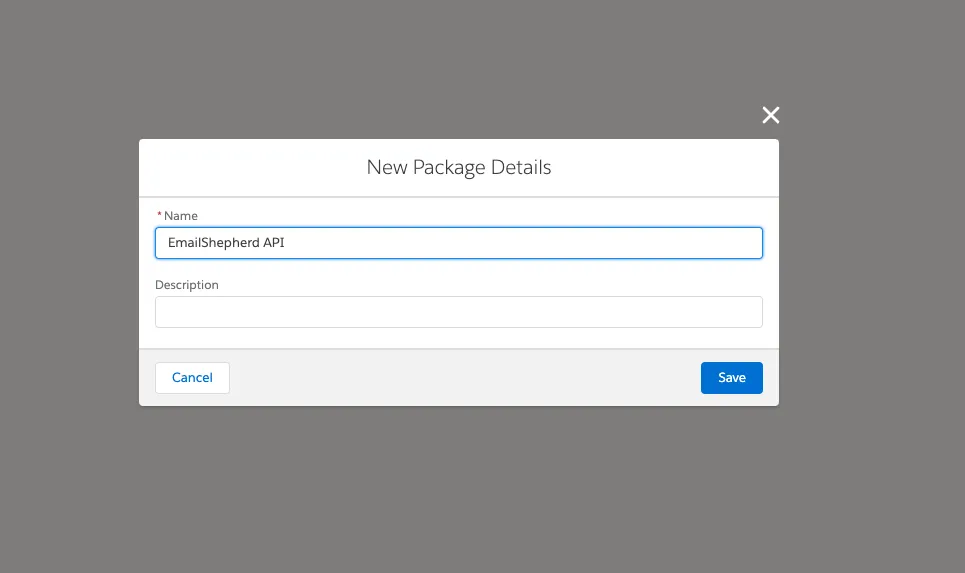
Enter a name, such as
EmailShepherd API, and a description if you want one. -
Click Save.
-
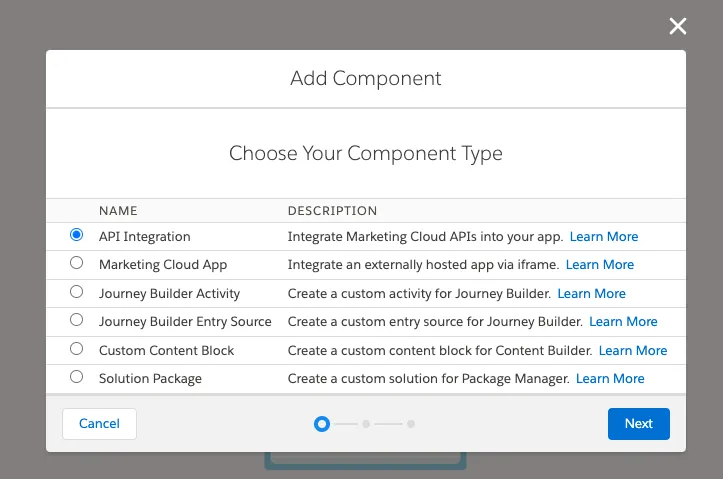
Click Add Component.
-
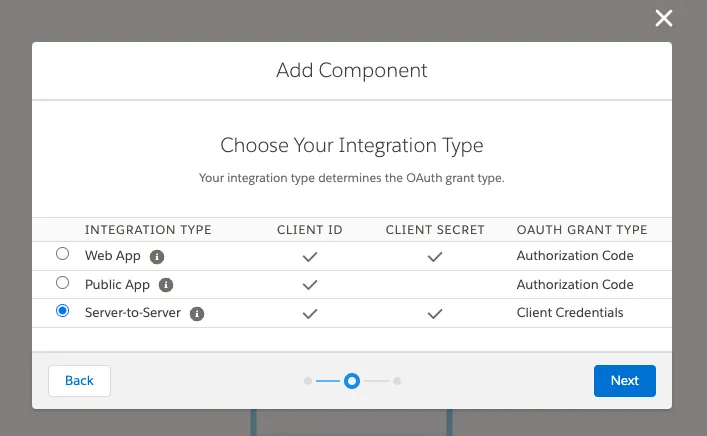
Select API Integration as the component type.
-
Select Server-to-Server as the integration type.
-
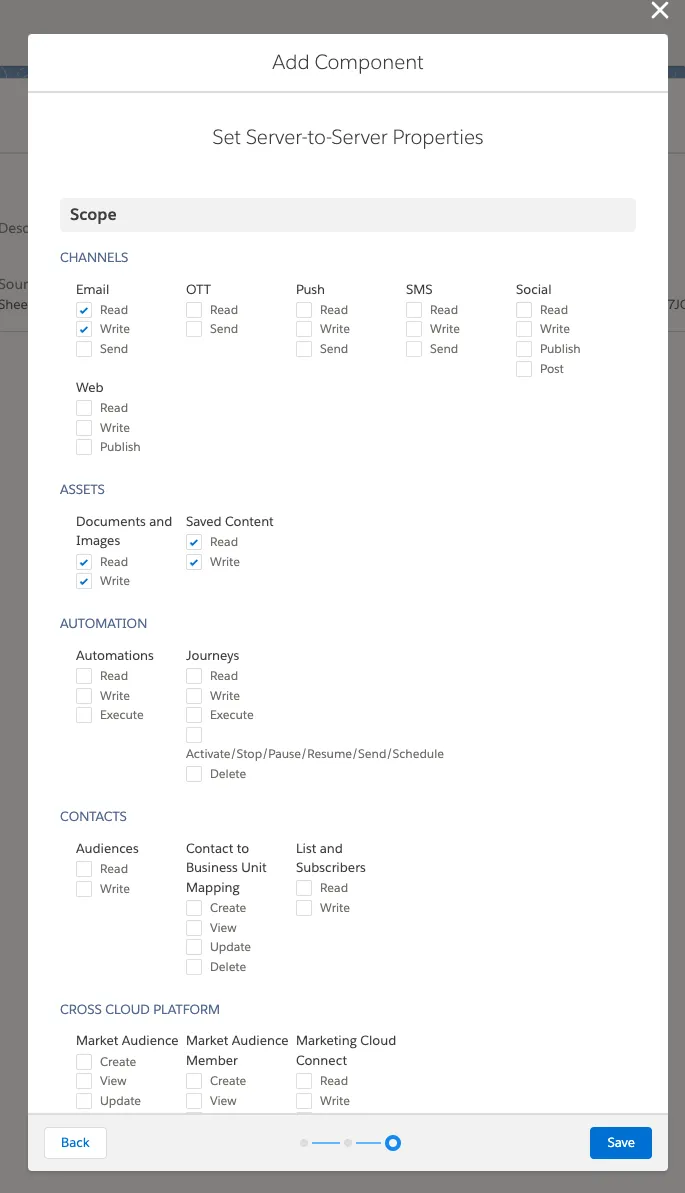
Select these scopes, and no others:
- Channels > Email: Read and Write
- Assets > Documents and Images: Read and Write
- Assets > Saved Content: Read and Write
-
Click Save.
-
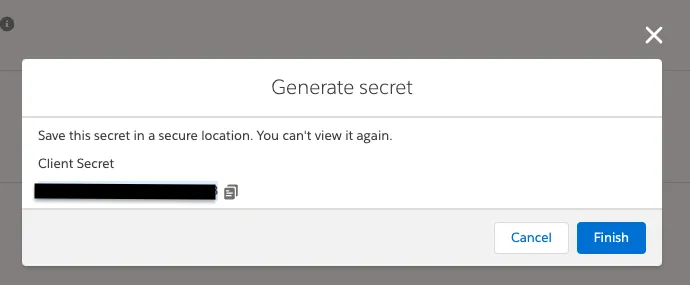
Copy the Client Secret and keep it somewhere safe until you’ve set up the connector.
-
Close the popup. On the package details page, copy the Client ID.
-
Find the REST Base URI and copy your subdomain. This is the part between
https://and.rest.marketingcloudapis.com/, such asmc4-340qx8pldwck920m8c4l2gy.
Set up the connector in EmailShepherd
Section titled “Set up the connector in EmailShepherd”- In the sidebar, click Connectors.
- On the Export Connectors tab, click Add connector.
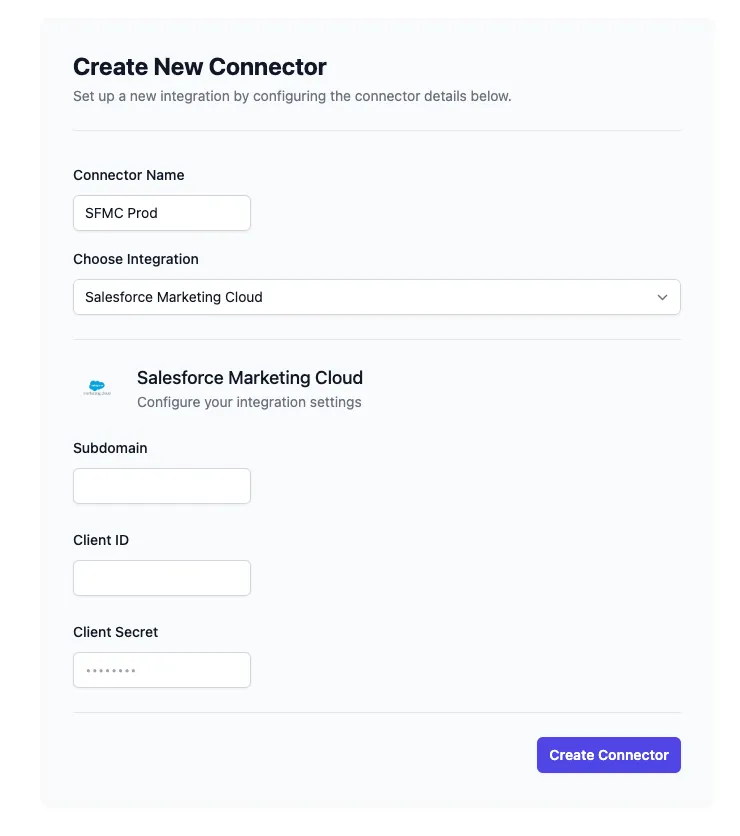
- In Connector Name, enter a name, such as
Salesforce Marketing Cloud. - In Choose Integration, select Salesforce Marketing Cloud.
- Enter the Subdomain, Client ID and Client Secret you copied from Salesforce Marketing Cloud.
- In Dynamic Content Profile, choose a dynamic content profile to use every time you export to Salesforce Marketing Cloud. To choose one each time you export instead, leave it as None.
- Click Create Connector.
Set up personalization for Salesforce Marketing Cloud
Section titled “Set up personalization for Salesforce Marketing Cloud”Salesforce Marketing Cloud uses AMPscript for personalization and dynamic content, such as %%=v(@firstName)=%%.
To export your personalization tags and conditionals in Salesforce Marketing Cloud’s syntax, set them up in a dynamic content profile for Salesforce Marketing Cloud, then choose it in the connector or when you export.
Export an email to Salesforce Marketing Cloud
Section titled “Export an email to Salesforce Marketing Cloud”See How to export an email to your ESP.
Each locale is exported as a separate HTML email in Content Builder. You can create a new email, or overwrite any existing email in Content Builder. When you create a new email, choose the Content Builder Folder to save it in.