

How to create a project
This article shows you how to create a project, which is the first step to building an email in EmailShepherd.
A project groups related emails together, such as a monthly newsletter series or a product launch campaign. Each project is owned by a team, and only members of that team can see and work on the emails inside it.
Before you begin
Section titled “Before you begin”You need to be a member of at least one team, because every project belongs to a team. If you aren’t a member of any teams, ask an Admin to add you to one. To learn how teams and projects fit together, see Team and Project Organization.
Create a project
Section titled “Create a project”-
In the sidebar, click Projects.
-
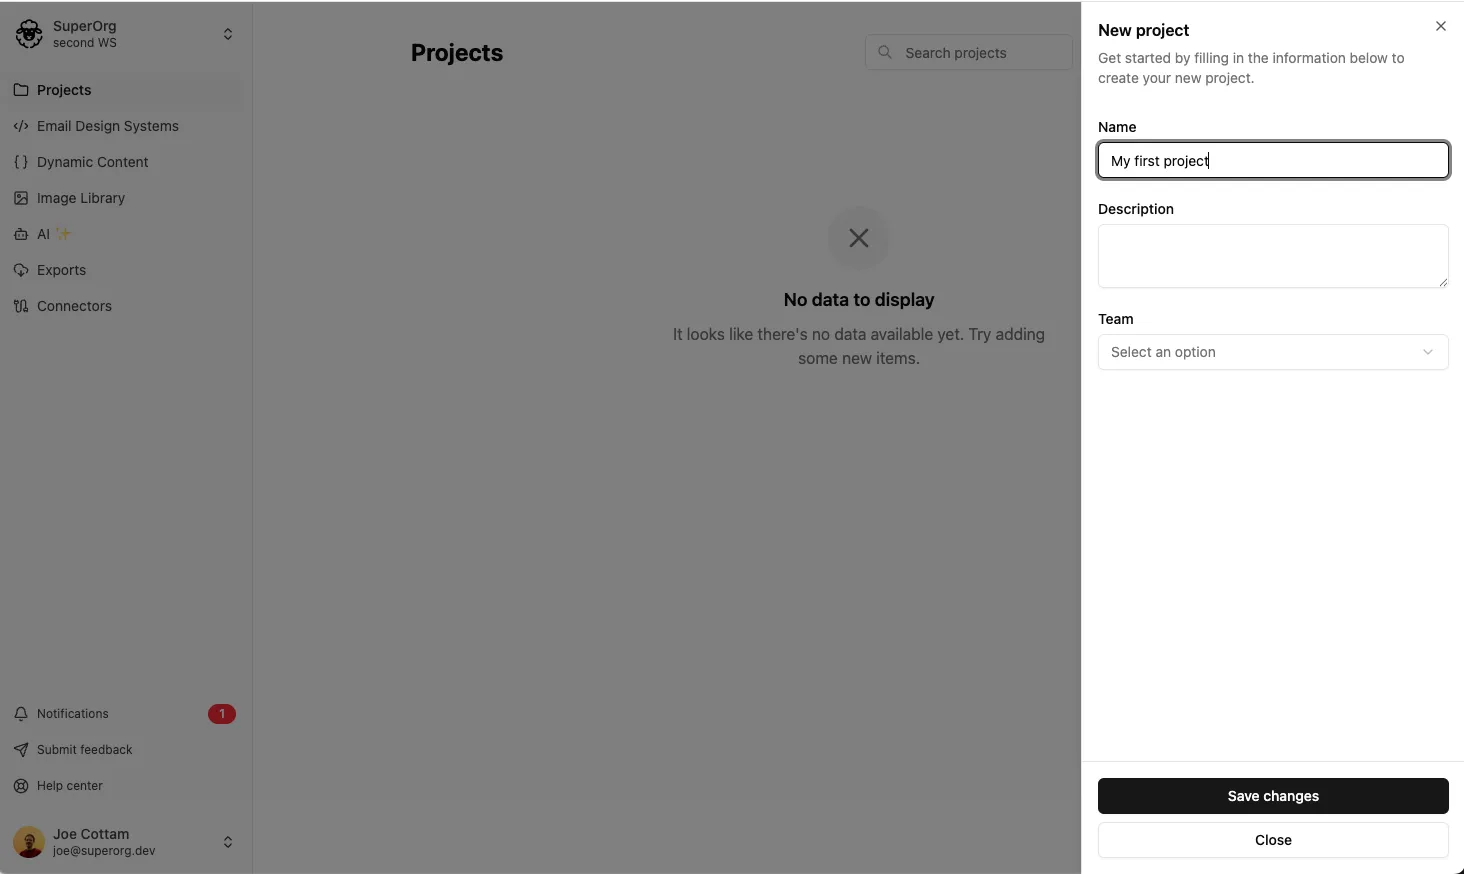
Click New project.
-
In Name, enter a name for the project, e.g. “Monthly Newsletter”.
-
Optionally, in Description, describe what the project is for.
-
In Team, select the team that will own the project. Only members of this team (and Admins) can access the project.
-
Optionally, set the Email defaults (see Set email defaults).
-
Click Create.
Your new project appears in the Projects list. Click it to open it and start adding emails.
Set email defaults
Section titled “Set email defaults”Email defaults are pre-selected each time someone creates an email in the project, so they don’t have to choose them every time. Anyone creating an email can still change them.
The Email defaults section only appears if your workspace has at least one Email Design System. You can set:
- Default Email Design System: the Email Design System (EDS) new emails use.
- Default brand profile: the brand profile new emails use. This only appears if the selected EDS has brand profiles.
- Default layout: the layout new emails start from. This only appears if there are layouts for the selected EDS.
Choose No default for any of these to leave them unset.