

How to rename and archive images
This article shows you how to find an image in the image library, see its details, and rename, archive or restore it.
Find an image
Section titled “Find an image”- In the sidebar, click Image Library.
- To find an image, type its name in Search images.
- To change the order, use the sort menu, e.g. Newest first or Name (A-Z).
See an image’s details
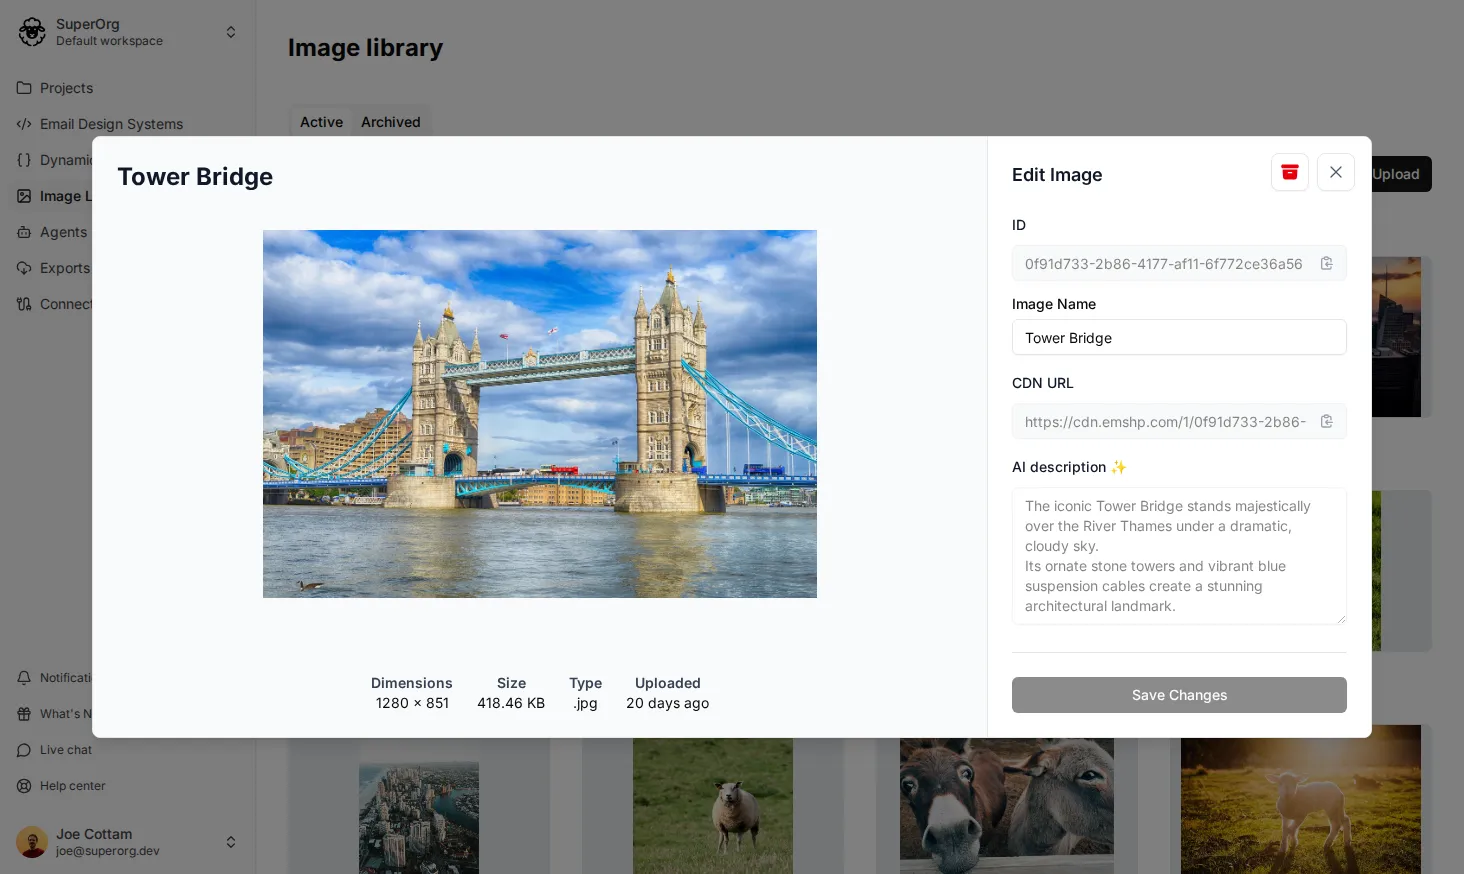
Section titled “See an image’s details”Click an image to open it. Under the image you can see its Dimensions, Size, Type and when it was Uploaded.
The Edit Image panel shows the image’s ID and CDN URL. Click the copy icon next to either one to copy it, for example to use the image’s URL outside EmailShepherd.
Rename an image
Section titled “Rename an image”- In the sidebar, click Image Library.
- Click the image to open it.
- In Image Name, enter the new name.
- Click Save Changes.
Archive an image
Section titled “Archive an image”Archive images you no longer want people to use. Archived images move to the Archived tab of the image library, and can’t be picked in the editor. Emails that already use an archived image aren’t changed.
- In the sidebar, click Image Library.
- Click the image to open it.
- Click the archive icon (Archive Image).
- Click Archive to confirm.
Restore an image
Section titled “Restore an image”- In the sidebar, click Image Library.
- Select the Archived tab.
- Click the image to open it.
- Click the restore icon (Restore Image).
The image moves back to the Active tab.