

How to create a feed
This article shows you how to create a feed and connect it to a component, so the people building emails can fill in the component with content from your API.
A feed fetches data from an API, such as your product catalogue, and maps it to a component’s fields. For example, with a product feed, someone building an email can enter a product ID, and the product’s name, price and image are filled in for them. This saves copying details in by hand, and avoids mistakes.
Create a feed
Section titled “Create a feed”-
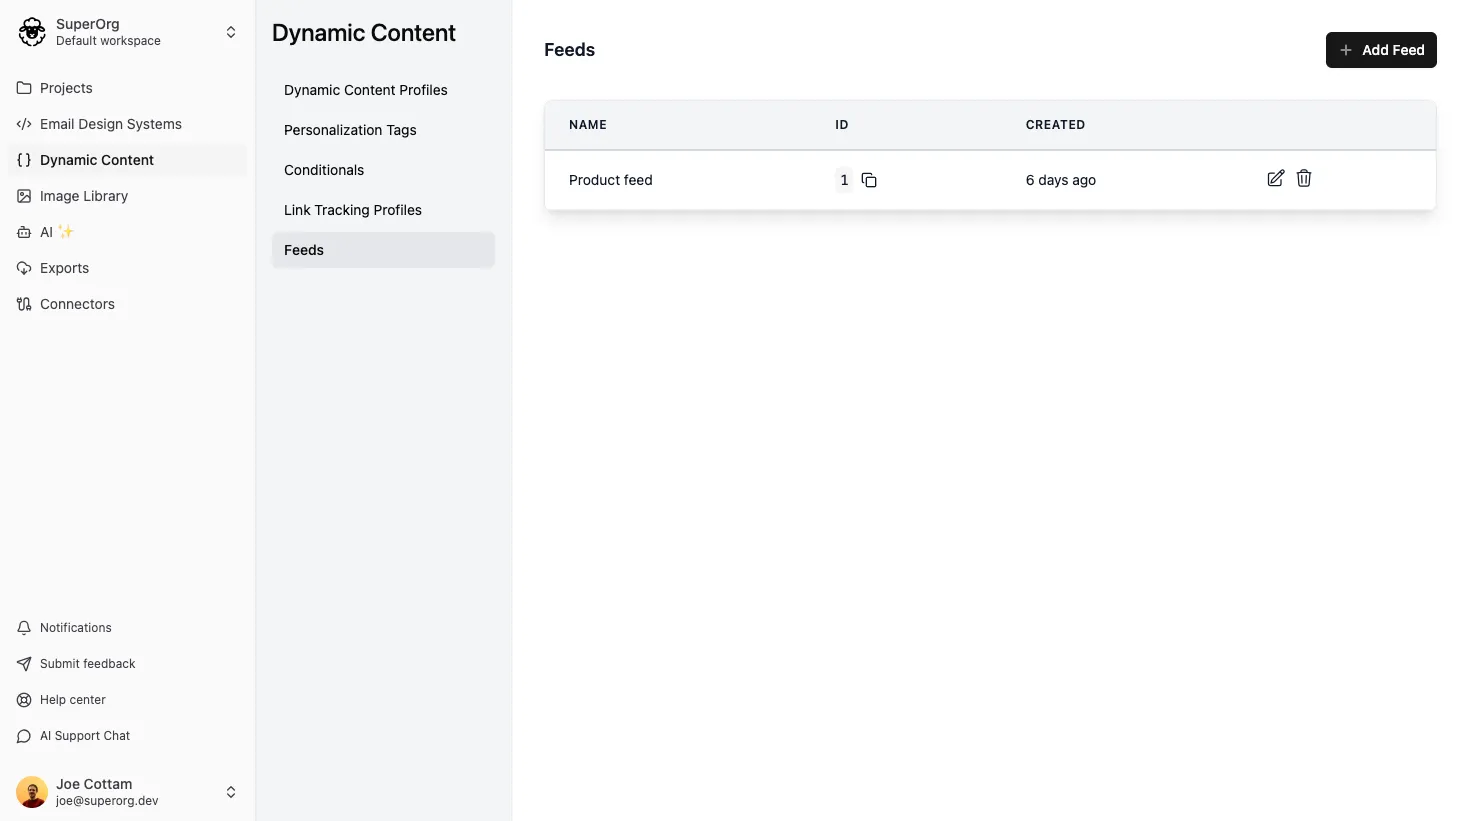
In the sidebar, click Dynamic Content, then select the Feeds tab.
-
Click Add Feed.
-
In Name, enter a name that describes the data, e.g. “Product feed”.
-
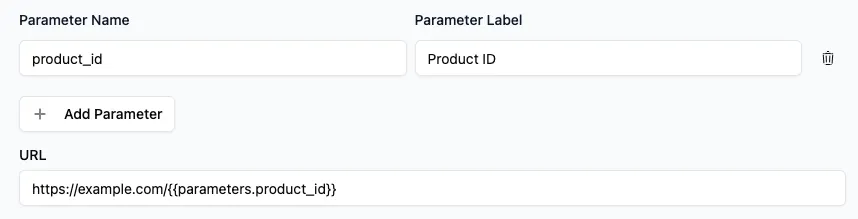
Under Parameters, add any values the person building the email needs to enter, such as a product ID. Click Add Parameter, then enter:
- Parameter Name: the name you use in the URL, e.g.
product_id. - Parameter Label: the name shown in the editor, e.g. “Product ID”.
- Parameter Name: the name you use in the URL, e.g.
-
In URL, enter your API’s address. To use a parameter’s value in the URL, write
{{parameters.followed by the parameter name and}}, e.g.https://example.com/api/products/{{parameters.product_id}}. See Use parameters in the URL. -
In Request Method, select GET or POST, depending on what your API expects.
-
Under Headers, add any headers your API needs, such as an API key. Click Add Header, then enter the Header Name and Header Value, e.g.
AuthorizationandBearer YOUR_API_KEY. -
Under Fields, add a field for each piece of data you want from the API’s response. Click Add Field, then enter:
- Field Name: a name for the data, e.g.
price. You’ll match this to a component field later. - Field Value: where to find the data in the response, e.g.
{{response.price}}. See Pick out data from the response.
- Field Name: a name for the data, e.g.
-
Click Save.
Use parameters in the URL
Section titled “Use parameters in the URL”Parameters are written in Liquid. If a parameter is called product_id and someone enters 123, this URL:
https://example.com/api/products/{{parameters.product_id}}becomes:
https://example.com/api/products/123If a value might include spaces or other special characters, such as a search term, add the url_encode filter so it’s safe to use in a URL:
https://example.com/api/search?q={{parameters.search_query | url_encode}}Pick out data from the response
Section titled “Pick out data from the response”Field values are also written in Liquid. Your API’s response is available as response. To pick out a piece of it, write response followed by the path to the data.
For example, say your API returns this for a product:
{ "id": 1, "name": "Woolly Hat", "price": 10.00, "images": [ "https://example.com/images/woolly-hat-1.jpg", "https://example.com/images/woolly-hat-2.jpg" ]}To get the product’s name, price and first image, add these fields:
| Field Name | Field Value | Result |
|---|---|---|
name | {{response.name}} | Woolly Hat |
price | {{response.price}} | 10.00 |
image | {{response.images[0]}} | https://example.com/images/woolly-hat-1.jpg |
Each part of the path is separated by a .. To get an item from a list, add its position in square brackets, starting from 0 for the first item. So response.images[0] is the first item in images.
Test the feed
Section titled “Test the feed”Once you’ve saved the feed, test it to check that it fetches the right data.
- Open the feed.
- Below the feed’s settings, enter a value for each parameter.
- Click Fetch Data.
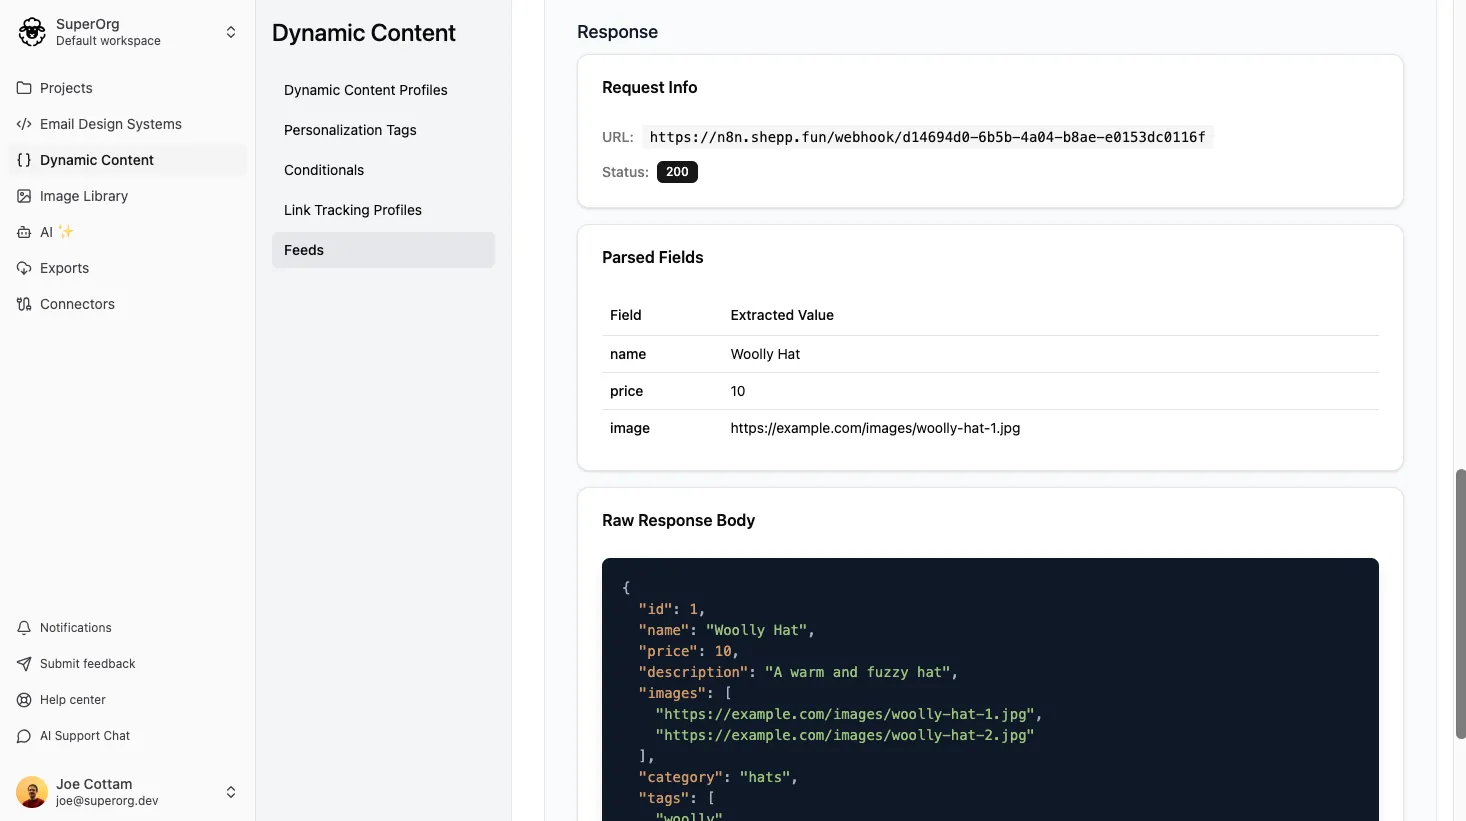
Under Response, check the results:
- Request Info: the URL that was requested, and whether the request worked.
- Parsed Fields: the value extracted for each field. Check that these are what you expect.
- Raw Response Body: the full response from your API, which helps you find the path to the data you want.
Connect the feed to a component
Section titled “Connect the feed to a component”To use the feed in emails, connect it to a component and match each feed field to a component field.
-
Open the component in the Component Builder.
-
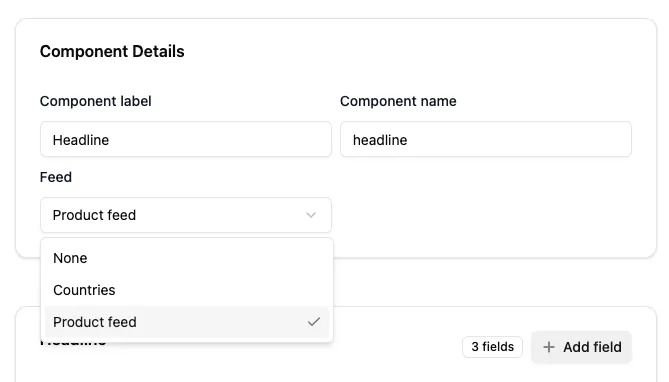
Select the Settings tab.
-
In Connected feed, select the feed.
-
Select the Fields tab.
-
Edit each field you want to fill from the feed, and in Feed field name, select the feed field.
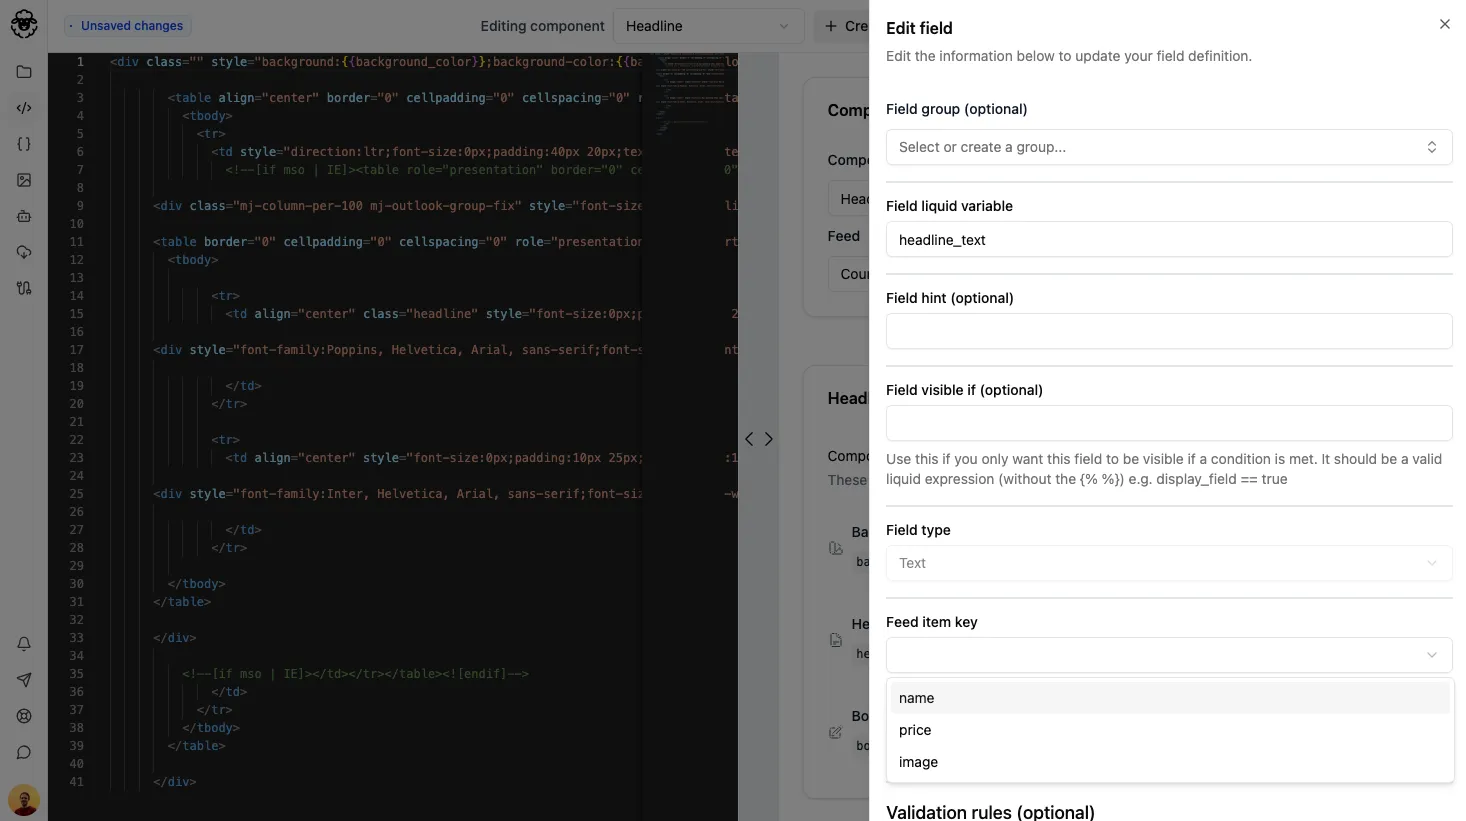
-
Save the component.
To use the feed in an email, see How to fill in a component from a feed.
Edit or delete a feed
Section titled “Edit or delete a feed”- In the sidebar, click Dynamic Content, then select the Feeds tab.
- Beside the feed, click the edit icon or the delete icon.
- Edit: change the feed, then click Save.
- Delete: confirm that you want to delete the feed.