

How to set up an MCP App
This article shows you how to create an MCP App, which lets people in your organization connect an AI tool to EmailShepherd. In this article, AI tool means an AI app you chat with that can connect to other software using MCP (Model Context Protocol), such as Claude or ChatGPT. These apps are also called MCP clients.
An MCP App registers one AI tool with your organization. It gives you a Client ID and Client Secret to enter in that AI tool. It also lets you limit what anyone connecting through it can do, for example only reading emails, never deleting them.
The Client ID and Client Secret don’t give access to anything on their own. Each person still signs in with their own EmailShepherd account, and can only do what their role allows.
Create one MCP App for each AI tool your team uses, e.g. one for Claude and one for ChatGPT.
Before you begin
Section titled “Before you begin”Find the redirect URI (sometimes called a callback URL) for the AI tool you want to connect. Each AI tool publishes its own, so check its documentation. For Claude, it’s https://claude.ai/api/mcp/auth_callback.
Create the MCP App
Section titled “Create the MCP App”-
In the top-left of the sidebar, click your organization’s name, then select Organization settings.
-
Click MCP Apps, then click Create MCP App.
-
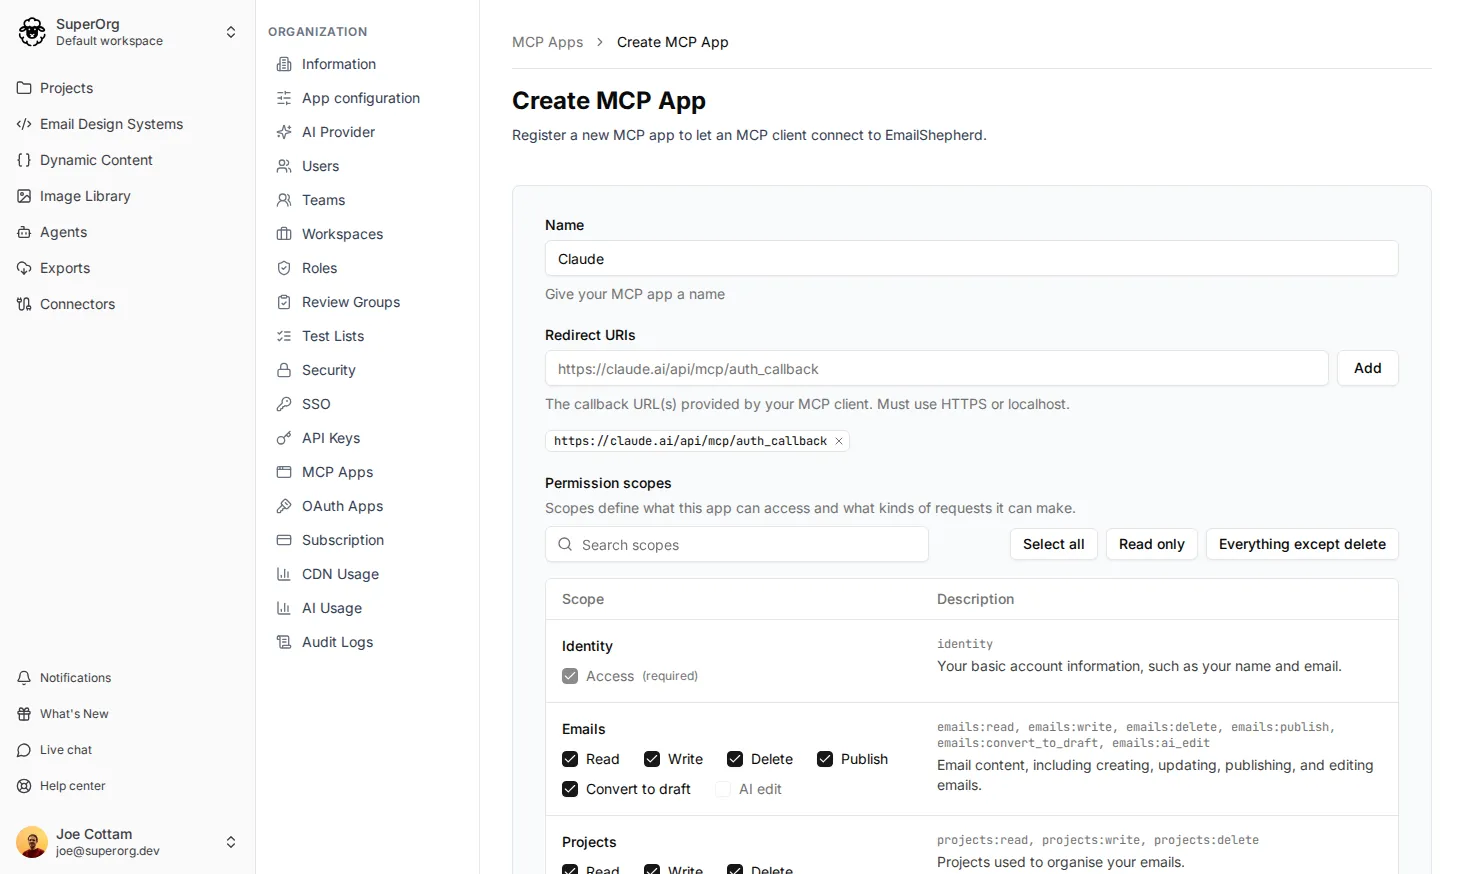
In Name, enter the name of the AI tool, e.g. “Claude”.
-
In Redirect URIs, enter the redirect URI for your AI tool and click Add. You can add more than one.
-
Under Permission scopes, choose what people can do through this app (see Choose permission scopes).
-
Click Create MCP App.
-
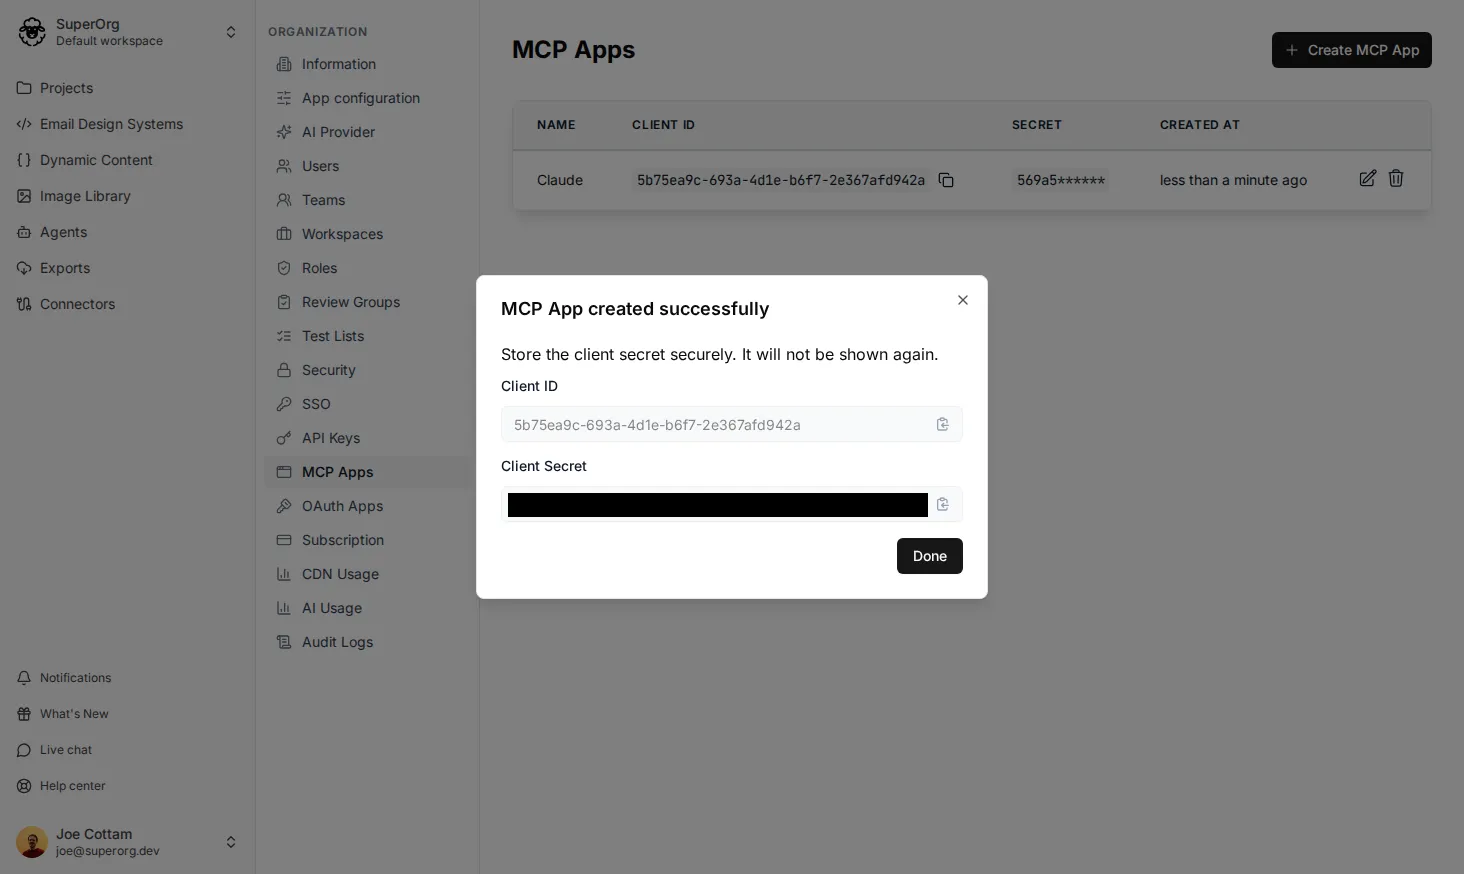
Copy the Client ID and Client Secret.
-
Click Done.
Share the server URL (https://mcp.emailshepherd.com/mcp), Client ID and Client Secret with the people who’ll connect, and point them to How to use EmailShepherd from your AI tool.
Choose permission scopes
Section titled “Choose permission scopes”AI can make mistakes, so you might not want an AI tool to be able to do everything you can. Scopes let you choose what it can and can’t do. For example, you could let it create and edit emails, but not delete anything.
Scopes are grouped by area, such as Emails, Projects and Image library. Most areas offer Read, Write and Delete. Scopes only ever limit access, so people can never do more than their own role allows.
To get started quickly, use one of the shortcuts:
- Select all: people can do everything their role allows.
- Read only: people can look at things, but not change them.
- Everything except delete: people can view and edit, but not delete anything.
Edit or delete an MCP App
Section titled “Edit or delete an MCP App”Go to Organization settings > MCP Apps and use the edit or delete icon next to the app. If you delete the app, everyone connected through it loses access.